New years eve 2012, my parents and I sat down to watch Julie and Julia it seemed like the perfect film to watch at the end of my baking year. This being the first film my mum has watched this year and it also showing my dad that I am not the only person to get huffy whilst baking (hopefully he will learn for next time, not to poke the bear!). Anyway as we ring in the new year in England after having a brilliant 2012 it seems only appropriate to tell you what my next challenge will be.
I love baking, but I love cooking just as much, in fact at one point in my life I had a serious plan to become a chef. After two days of work experience in a 5* hotel I realised that I could not cut the pressure. And so cooking went back to being a hobby, a way to relax after a long day at university, to help me relax after an argument, or just to let me show my creative side. Anyway, I wanted to have a new challenge, something just as fun but also difficult, because what is life without the odd struggle? So here it is, my next challenge: To create a new recipe each week. It could be baked, boiled, fried, roasted, smoked or steamed, it just has to come out of my head and onto a plate.
So here is to 2013... a year of creating new things (and playing with my new Kitchen Aid Artisan Mixer)!
Cxxx

A blog about a love of London, crafts, cooking and tea.
Monday, 31 December 2012
52 Bakes in 52 Weeks.
52 bakes in 52 weeks. That was the plan. The whole reason I thought up this baking challenge was because I had been technically unemployed for 9 months, was working in my parents business and felt, to be honest, really crap that I had nothing going for me. After about two months of my bakes, I was off to Somerset for an interview at my dream job working with children with dyslexia. I got the job, passed my driving test and moved to Somerset in the space of a month. Things had changed quickly. And yet, I still carried on baking. At the start I did it to have something positive to look forward to each week, being jobless, living with your parents and stuck in the middle of nowhere was kind of depressing. It was a great challenge, I got to spend hours thinking about baking, time to sit and create recipes and I have to admit, the best thing really was the praise I got. The comments on this blog have be absolutely lovely, I have also had amazing comments from my friends on Facebook and of course the praise from the B&B guests and my work colleagues (and the kids I see!).
So enough with the serious stuff! What has been my favourite bake... probably the Eton Mess cake. I cannot tell you how happy I was when eating it and how sad I was when it was all gone. I loved creating recipes like the Eton Mess Cake and the Reblochen Quiche, and of course my feeble attempts at sugar-craft. I only burnt myself 4 times (which I think is pretty good considering how clumsy I am) and have even spent nights dreaming of baking! I have spent way too much money on baking equipment which I probably didn't "need" and even enjoyed a day out at The Cake and Bake Show.
So what next? We first I must say to anyone who decides to do a year of baking or cooking, how great and fun it is. But for me personally, I will not be doing another year of a different bake each week, it has served me well but I am slowly running out of ideas. Instead I will be doing a new and possibly harder challenge... but you will just have to wait until the new year to find out that one!
So here it is, my final bake. Number 52. And of course I have set myself a big 'showstopping' challenge: Croquembouche.
Ingredients:

I actually found myself rather sad at the end of this bake, a year has passed and in the end I have achieved a lot. But that's just it, it is an ending. However the one thing I have been craving all year is a Kitchen Aid Mixer, well thanks to some money for Christmas and me saving up I have been fortunate enough to buy myself on in the sales! So I now have a Candy Apple Red Kitchen Aid Mixer, which means its not really an ending but a beginning...
So enough with the serious stuff! What has been my favourite bake... probably the Eton Mess cake. I cannot tell you how happy I was when eating it and how sad I was when it was all gone. I loved creating recipes like the Eton Mess Cake and the Reblochen Quiche, and of course my feeble attempts at sugar-craft. I only burnt myself 4 times (which I think is pretty good considering how clumsy I am) and have even spent nights dreaming of baking! I have spent way too much money on baking equipment which I probably didn't "need" and even enjoyed a day out at The Cake and Bake Show.
So what next? We first I must say to anyone who decides to do a year of baking or cooking, how great and fun it is. But for me personally, I will not be doing another year of a different bake each week, it has served me well but I am slowly running out of ideas. Instead I will be doing a new and possibly harder challenge... but you will just have to wait until the new year to find out that one!
So here it is, my final bake. Number 52. And of course I have set myself a big 'showstopping' challenge: Croquembouche.
Ingredients:
- 200g of plain flour
- 1/2 teaspoon of salt
- 150g of butter
- 6 eggs
- 250ml of double cream
- 3 tablespoons of icing sugar
- 300g of caster sugar
- 150g of 70% dark chocolate
- 150ml of cream
- Royal icing
- 100g of butter, softened
- 100g of caster sugar
- 2 eggs
- 1 teaspoon of vanilla essence
- 100g of self raising flour
- 25g of coco powder
- 150g of milk chocolate
- chocolate transfer paper
- Sift the flour onto a large piece of greaseproof paper. This will get air into the mixture. I halved this mixture for ease.
- Put the salt, butter and water into a saucepan and and gently heat until the butter is melted, then quickly bring it up to boiling point.
- As soon as it boils, take it off the heat and pour in the sifted flour then beat it! The mixture will be a mess at first, but keep beating until it becomes a heavy dough.
- Put the pan back on the heat and keep beating for 2-5 minutes, until the dough comes into a ball and when you press your finger into it the dough it is greasy.
- Tip the dough out into a mixing bowl and allow to cool, until it is just warm.
- Pre-heat the oven to 200c.
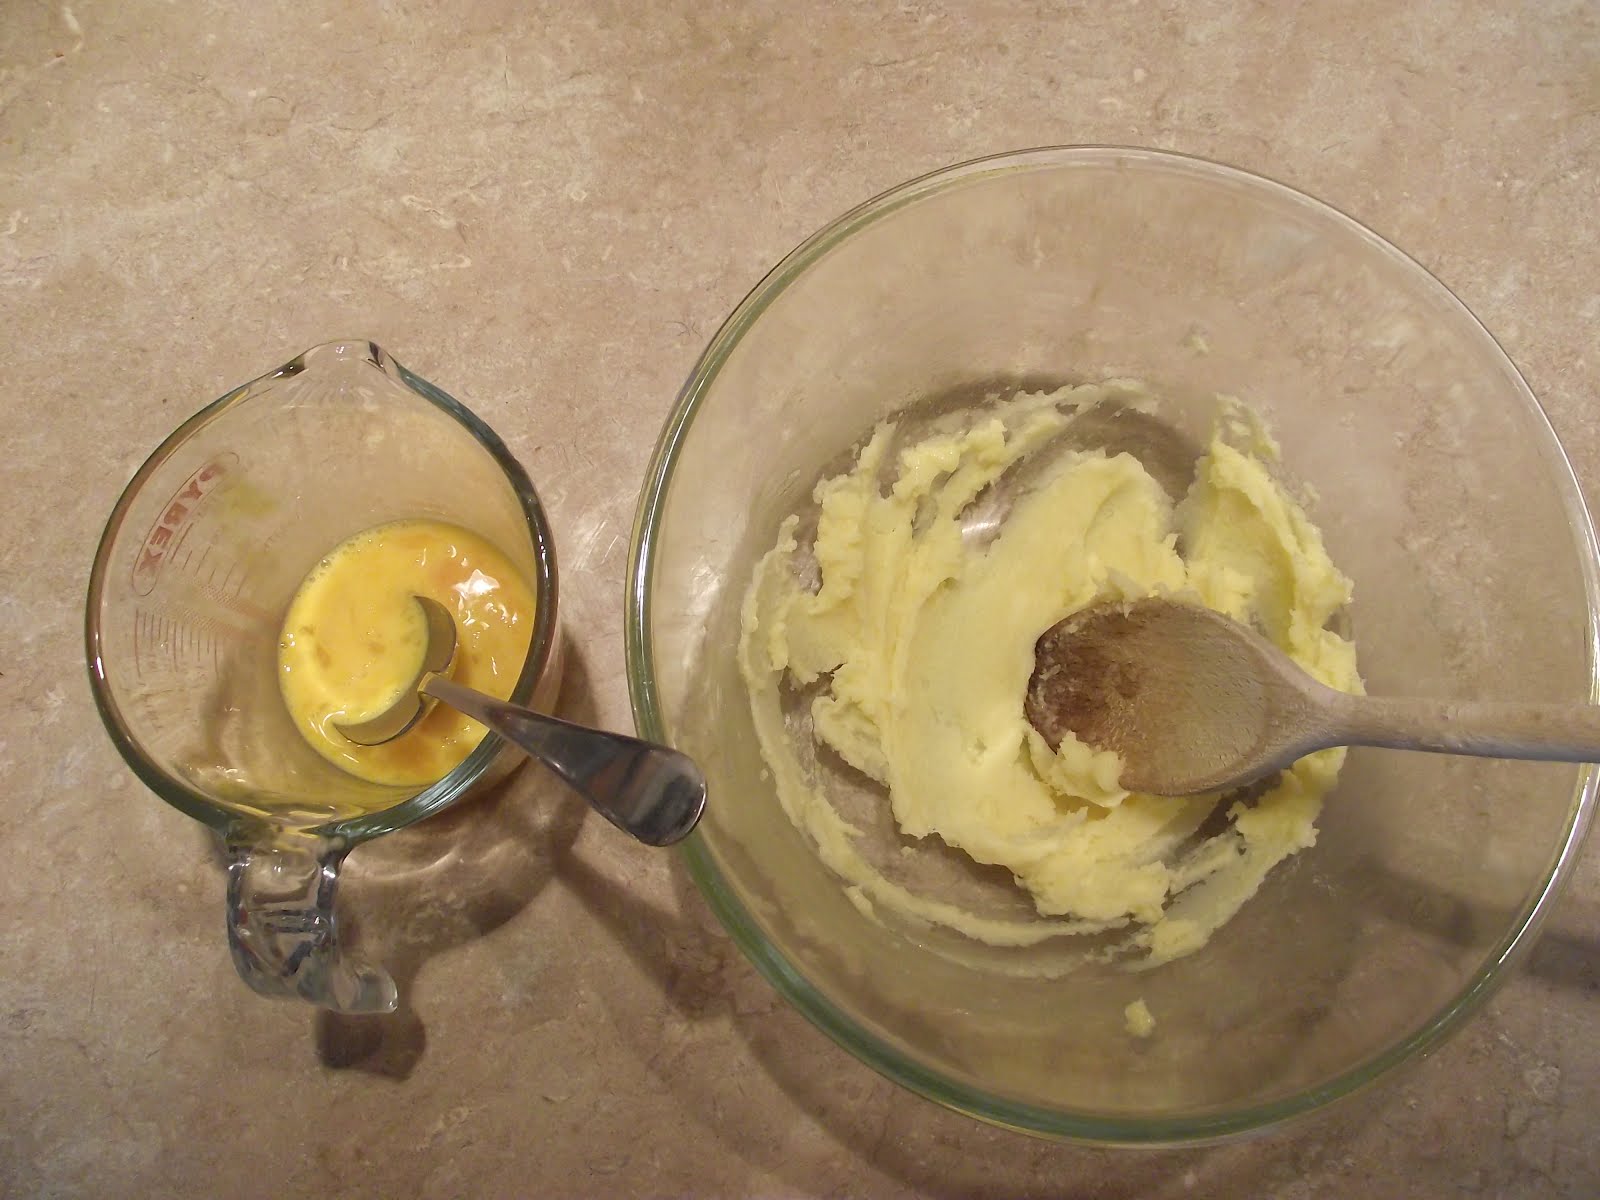
- Now using an electric mixer slowly add the eggs in a bit at a time, mix well in between each addition. Once it is all added the mixture should look like a shiny paste and be liquid enough to be able to pipe. If you need to make it easier to pipe, break another egg and slowly add it until you get it to the right consistency. It should fall off a spoon slowly.
- Now pipe the mixture with a wide circle nozzle onto a greaseproof paper. Pipe circles about 2-3cm wide.
- Bake for 15 minutes without opening the oven door. Then reduce the oven temperature to 180c and open the oven door to let the steam out. Cook for another 5 minutes to dry them out.
- Remove them from the oven and poke a hole in them so that they can dry out and you can pipe them later.
- Now make the chocolate cake presents. Beat the softened butter with the caster sugar, then gradually add the eggs and vanilla essence (basic cake recipe here).
- Fold in the flour and coco powder then pop in a pirex dish and microwave for 3-4 minutes.
- Once cooled break up the cake into cake crumbs and mold them with a little butter and icing sugar so that they stick together (like cake pops).
- Mold them into present shapes then leave them in the fridge to cool. Meanwhile melt the chocolate, then drizzle it over the cake pops on a cooling rack and cover the chocolate with cut up squares of the chocolate transfer paper. Let these harden then peel off the transfer paper to revel 'wrapping paper'.
- Once all the choux rolls have cooled (it should make around 180-200) whip the cream with 2 tablespoons of icing sugar and using a small nozzle pipe the cream into the hole you made in each choux.
- Now melt the sugar with 4 tablespoons of water to create a light coloured caramel.
- Start creating the croquembouche by making a circle of profiteroles in a 25cm circle and 'glueing down' with the caramel. Continue building up and inwards. Be VERY CAREFUL of burning yourself on... I burnt myself badly on my finger 5 minutes from the end of a year of baking, typical!
- Once you have built the tower pop it in the fridge so the cream doesn't turn and make the chocolate genache. Warm the cream in a saucepan until you can just keep your finger in it, then remove from the heat and break the chocolate into it and melt it by stirring.
- Let it cool slightly and drizzle over the Croquembouche (I piped mine which I regret as I don't think it looks that good).
- Finally, roll out white royal icing and cut out stars to decorate. Spray with silver icing spray then using the caramel stick the stars to the croquembouche and you are done!

I actually found myself rather sad at the end of this bake, a year has passed and in the end I have achieved a lot. But that's just it, it is an ending. However the one thing I have been craving all year is a Kitchen Aid Mixer, well thanks to some money for Christmas and me saving up I have been fortunate enough to buy myself on in the sales! So I now have a Candy Apple Red Kitchen Aid Mixer, which means its not really an ending but a beginning...
Wednesday, 19 December 2012
The penultimate bake.
Week 51, Bake 51.
On the 13th of December it was my brother's 25th birthday. Sadly he spent the day where he lives in London, so I couldn't bake this for him on his actual birthday, which annoyed me as I was super excited about creating this bake. Anyway, I digress. I decided to create a themed cake as I am rubbish at novelty cakes and wanted to do something a little bit special. When we were kids we used to always get Lego for Christmas and our birthdays. To be honest, we were obsessed. Each year going to the Lego convention, being 'Gold' members of the Lego club and even getting VIP tickets to Lego land before it opened. The love of Lego has never gone away, and so I decided to create a Lego cake for him to help him remember his childhood (plus it would be so much fun for me!). I created two cakes to create a tier effect, the lower tier is a chocolate cake and then the upper tier is a vanilla cake. So here it is my Lego bake.
Ingredients:
For the chocolate cake:
- 200g of butter
- 50g of milk chocolate
- 350g of plain flour
- 400g of caster sugar
- 1 teaspoon of bicarbonate of soda
- 50g of coco powder
- 2 eggs
- 200ml of milk with a splash of lemon juice in it.
- 200g of unsalted butter, softened
- 200g of caster sugar
- 3 eggs
- 1 teaspoon of vanilla essence
- 250g of self-raising flour
- 3 tablespoons of milk
And everything else!
- Icing sugar
- 200g of butter
- splash of milk
- Jam
- Royal icing
- Assorted food colouring
- Lego men
Method:
- Pre-heat the oven to 170c.
- Melt the chocolate and butter together making sure not to burn.
- In a large bowl mix the flour, sugar, a pinch of salt, bicarbonate of soda and cocoa powder together.
- Break the eggs and whisk them with milk. Boil the kettle.
- Now add the butter/chocolate mix to the dry ingredients, and whilst whisking add the eggs/milk also into the bowl.
- Now mix 150ml of boiling water into the cake mixture.
- Line and grease a 23cm spring pan cake tin then pour the mixture into it and cook for 45 minutes (or until you put a knife in and it comes out clean).
- Now make the vanilla sponge. Cream the butter and sugar together until light, pale and fluffy.
- In a jug, beat the eggs together and slowly add this to the butter/sugar mixture whilst still beating it.
- Add in the vanilla essence.
- Now sift the flour and fold it in. At this point you can also add the milk.
- Line and grease two 19cm sandwich tins and divide the mixture into two.
- Cook at the same temperature for 18-20 minutes or until slightly golden.
- Once out of the oven, take them out of their tins and pop them onto a cooling rack.
- Beat the butter and icing sugar together to create a butter-cream icing, use some milk to loosen this up.
- Once the cakes are cool, cover them both with the butter-cream icing. This will help the royal icing to stick.
- Make the vanilla cake by putting jam in the middle, like a Victoria Sponge.
- Roll out some royal icing to cover the cakes.
- On the top tier, slice a quarter of the icing off and peel it away. Now using some different colour icing create Lego blocks so it looks like the cake is made of Lego.
- Make bigger Lego blocks out of the left over icing to have at the base of the cake.
- Pipe any words you want on it and then assemble your Lego figures on it.


Saturday, 15 December 2012
Time to play with my blow torch!
Week 50, Bake 50.
Only two more to go after this! People have started asking me what I am going to do next year... Will I continue baking? Will I start a new challenge? Will I do something crafty instead of cooking? And my answer...? Well actually I do have a good idea but I won't reveal it until January 1st 2013. Anyway, back to baking! So as I said in my previous blog, I am back home for the holidays and so decided to bake something a little different. I couldn't do it in Somerset as I don't have half the equipment (individual dishes and my blow torch). To be honest half the reason why I did this bake was so that I could play with my blow torch again! So here it is: Creme Brulee.
Ingredients:
- 500ml of double cream
- 1 vanilla pod
- 100g of caster sugar
- 6 egg yolks
- Plus extra caster sugar
- Pre-heat the oven to 150c.
- Split the vanilla pod and scrape out the seeds into the cream, chop the pod up and add it to the cream.
- Now put the cream into a saucepan and bring to the boil. Once boiling, reduce the heat and let it simmer for 5 minutes.
- Meanwhile whisk the egg yolks and caster sugar together until they become lighter in colour.
- Take the cream off the heat and pour a small splash into the eggs continuously whisking so the eggs don't scramble. Now pour the rest in gently.
- Whisk until it becomes thicker, if it doesn't then pop it back on the heat in a saucepan and gently warm it for another minute.
- Now get your ramekins, place them in a deep roasting tray and fill them 2/3rds full with the custard mixture. Surround them with hot water to create a ban Marie (about half way up the ramekins) then bake for about 30 minutes. They will be done when there is a slight wobble in the centre of the custard.
- Finally, finish them off with the a tablespoon of caster sugar. Using your blow torch (yes... Blow torch!) caramelise the sugar. Serve right away with raspberries.

End of term treats
Week 49, Bake 49.
No I haven't fallen at the last hurdle and given up on Bake 48... I just haven't had the time to write up my last bake entry. Since the mince pies, I have had a very busy last week of term then packed and drove up to Norfolk (250 miles) to my parents for the festive season... and now of all things I have a cold! So here is my 49th bake, cake pop treats for the kids at the end of term!
(makes about 30)
Ingredients:
- 400g of butter (at room temperature)

- 220g of caster sugar
- 4 eggs
- 2 teaspoon of vanilla essence
- 220g of self-rising flour
- 2 cups of icing sugar
- 250g of milk chocolate
- Royal icing and colouring
- Edible glitter
- Pre-heat the oven to 180c and line a cake tin with baking parchment.
- First make the cake, do this by beating 220g of the soften butter together with the caster sugar. Beat until the mixture is light and fluffy.
- Now in a jug, beat the eggs
 together
and add to the butter/sugar one tablespoon at a time, so not to curdle
the mixture. Now beat in the vanilla essence into it.
together
and add to the butter/sugar one tablespoon at a time, so not to curdle
the mixture. Now beat in the vanilla essence into it. - Sift the flour and cornflour into the mixture and fold it in, so not to loose air.
- Turn the cake into the lined tin and bake for 20-25 minutes.
- Remove from the tin once cooked and cool until you are able to touch it.
- Once cool crumble the cake into a mixing bowl, and make the whole cake into crumbs.
- Now make your butter cream, beat the remaining butter and icing sugar together. Add this to your cake mixture and using your hands squish both the mixtures together until everything is combined.
- You can now shape your cake pops. Once you have done this, pop them in the fridge for 10 minutes to harden up.
- Meanwhile melt the packet of chocolate. Now dip a lolly pop stick into the chocolate and inset it into the bottom of your pop and put in back into the fridge for another 10-20 minutes. Do this for the rest of the cake pops. To make sure they stay the perfect shape, I put them into a block of oasis.
- Now dip the whole cake pop into the melted chocolate to cover it then twist the pop to remove the excess chocolate.
- Pop these back in the Oasis and allow to harden.
- Meanwhile make the pudding decorations, a rolled out circle of white icing for the top, red balls covered in glitter and green icing to make holly leaves.
- Now all you have to do is assemble them, using water to stick them to the icing.


Subscribe to:
Comments (Atom)